Key takeaways
- Drylining installation runs in clear stages: setting out, fixing the metal frame, boarding, then taping and jointing to a decoration-ready finish.
- The overall timeline depends on wall area, access, and the number of openings and services — not just the boarding itself.
- Most defects trace to a few avoidable causes: poor setting out, wrong fixings or centres, and inadequate jointing.
- Quality is verified by inspection against the specification before handover.
The Drylining Installation Process:
What to Expect from Start to Finish
Whether you are fitting out a new commercial space, renovating your home, or managing a large-scale development, understanding the drylining process puts you in a stronger position. At BAS Frames, we believe informed clients get better outcomes — so this guide walks you through every stage of a professional drylining installation, from the initial site survey to final handover.
Knowing what to expect also helps you plan around the work with minimal disruption to your project timeline.
What Is Drylining and How Does It Work?
Drylining (also called dry lining or drywall installation) is a method of lining internal walls and ceilings using plasterboard fixed to a metal or timber frame, without the need for wet plaster. The result is a smooth, thermally efficient, and acoustically effective surface that is ready for decoration.
The drylining process is faster, cleaner, and more consistent than traditional plastering, which is why it is the industry standard for modern residential and commercial construction across the UK.
Common drylining applications include:
- Partition walls and stud walls
- External wall insulation linings
- Ceiling systems (suspended and direct fix)
- Encasements around steel columns and services
- Fire-rated and acoustic wall assemblies
The Drylining Installation Steps: Stage by Stage
Every project is different, but the core drylining installation steps follow a reliable sequence. Here is what happens during drylining from the moment BAS Frames arrives on site.
Stage 1: Site Survey and Specification
Before any materials arrive, our team carries out a thorough site survey. We assess the structural substrate, check for moisture issues, review architectural drawings, and confirm the specification with your project manager or architect.
At this stage, we confirm:
- The correct board type (standard, moisture-resistant, acoustic, or fire-rated)
- Frame centres and structural fixing requirements
- Any service routes for electrical, plumbing, or mechanical first fix
- Access requirements and sequencing with other trades
This stage is critical for the drylining process because getting the specification right at the outset prevents costly changes later.
Stage 2: Setting Out and Layout
With the survey complete, our fixers mark out wall positions, ceiling levels, and door openings on the floor and structure. Accurate setting out at this stage ensures that partition layouts align with architectural drawings and that all dimensions are correct before a single stud is fixed.
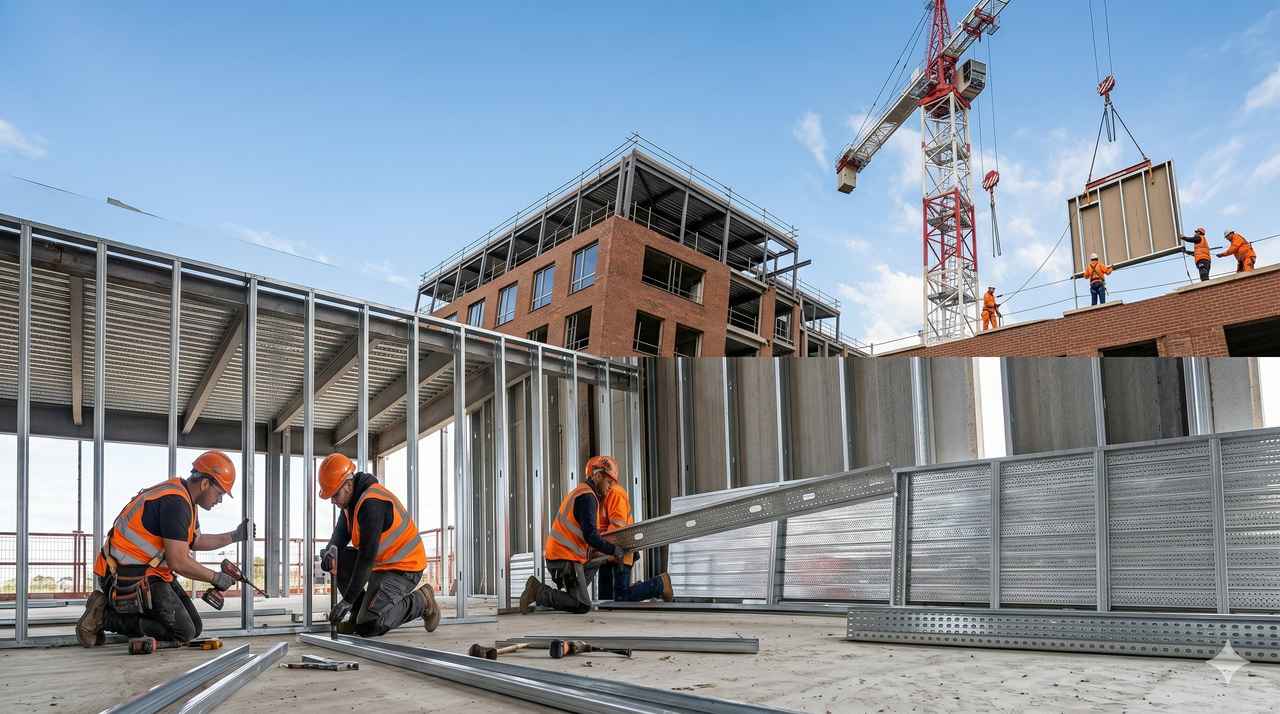
Floor and ceiling tracks are fixed first using powder-actuated fasteners or mechanical fixings, depending on the substrate. Laser levels are used throughout to ensure plumb and level accuracy.
Stage 3: Metal Framing
Metal stud framing is installed within the floor and ceiling tracks. Stud centres are positioned to suit the plasterboard sheet sizes (typically 600mm centres) and the structural loading requirements. Where heavier wall-hung items such as kitchen units, radiators, or handrails are required, additional noggins or heavier-gauge studs are fitted.
The framing stage also includes:
- Door frame boxing and head reinforcement
- Service penetration zones for pipes and cables
- Acoustic isolation clips or resilient bars on ceilings
- Fire stopping around penetrations where required by spec
Stage 4: First Fix Services (Other Trades)
Once the frame is complete, the drylining works temporarily pause to allow electricians, plumbers, and mechanical contractors to run their first fix services — cables, conduits, pipework, and ductwork — within the void created by the stud frame.
BAS Frames coordinates closely with the principal contractor to manage this interface, ensuring services are signed off before boarding commences. This sequencing is one of the most commonly misunderstood parts of the drylining timeline, so clear communication between all trades is essential.
Stage 5: Plasterboard Installation
With services signed off, boarding begins. Plasterboard sheets are cut to size, lifted into position, and fixed to the stud frame using drywall screws at the specified centres — typically 200–300mm at the edges and 300mm in the field — in accordance with the board manufacturer’s guidance.
During plasterboard installation:
- Joints are staggered to improve structural integrity
- Recessed edges are used at vertical board joints for taping
- Cut edges are positioned away from external corners
- Boards are fitted tightly to the ceiling with a 10–12mm gap at the floor for movement tolerance
Stage 6: Taping and Jointing
Taping and jointing is the process of filling and feathering all board joints, internal angles, and screw dimples to create a seamless surface. This typically involves three coats of jointing compound with drying time between each:
- Coat 1: Tape embedded in jointing compound across all recessed joints
- Coat 2: Wider feathering coat to blend joints into the face of the board
- Coat 3: Skim coat to achieve a Level 5 finish where required
The level of finish required will depend on the intended decoration — a painted wall will require a higher finish level than a tiled or dry-lined surface. BAS Frames will agree on the finish specification with you before work begins.
Stage 7: Bead and Stop Work
Metal or plastic beads are fitted to all external corners, reveals, and opening edges to protect board edges and create clean, sharp lines. Stop beads are installed at junctions with different surfaces, such as brickwork, blockwork, or glazing frames. All beads are bedded in jointing compound and finished flush with the board face.
Stage 8: Sanding and Inspection
Once all jointing compound has fully dried, the surfaces are sanded smooth. Any hollows, ridges, or imperfections are touched up and re-sanded until the surface meets the agreed finish specification.
Our site supervisor carries out a visual inspection under raking light conditions — the most effective method of identifying surface irregularities that would otherwise only become apparent after decoration.
Stage 9: Handover and Snag Clearance
The completed drylining works are handed over to the client or principal contractor for inspection. Any snagging items are logged and cleared promptly. We provide completion paperwork, any required test certificates (for fire-rated or acoustic assemblies), and as-built notes if required.
At BAS Frames, we do not consider a job complete until the surface is genuinely ready for the next trade. That commitment to quality at every stage is what keeps our clients coming back.
Typical Drylining Timeline
Drylining timelines vary significantly depending on the project scale and complexity. As a general guide:
| Stage | Small Domestic | Commercial / Large Scale |
| Site Survey & Setting Out | Half a day | 1–2 days |
| Metal Framing | 1–2 days | 1–2 weeks |
| First Fix (Other Trades) | 1–3 days | 1–3 weeks |
| Plasterboard Installation | 1–3 days | 1–4 weeks |
| Taping & Jointing (inc. drying) | 2–4 days | 1–3 weeks |
| Sanding & Inspection | Half to 1 day | 2–4 days |
| Snag Clearance & Handover | 1 day | 2–5 days |
Note: These figures are indicative only. Your BAS Frames project manager will provide a detailed programme tailored to your specific project at the quotation stage.
What Can Affect the Drylining Process?
Several factors can influence how smoothly and quickly the drylining installation progresses. Being aware of these helps you plan effectively and avoid surprises.
Building moisture levels
New-build concrete, screed, or blockwork must reach an acceptable moisture content before boarding commences. Excess moisture behind plasterboard can lead to mould, board distortion, and joint cracking. We always advise clients to allow adequate drying time before drylining begins.
Access and phasing
On occupied or live sites, restricted access windows can extend the overall programme. Early discussion of access hours, floor sequencing, and temporary protection measures helps us build a realistic schedule.
Specification changes mid-project
Last-minute changes to wall layouts, board types, or fire/acoustic ratings can disrupt the programme and add cost. Finalising the specification before work begins is strongly recommended.
Trade sequencing and site management
Drylining sits at the intersection of several trades. Delays to first fix services, structural works, or preceding trades will have a knock-on effect on the drylining timeline. BAS Frames works proactively with site management to flag and resolve sequencing issues early.
Why Choose BAS Frames for Your Drylining Project?
At BAS Frames, we have been delivering high-quality drylining installations across London and the South East for years. Our team of experienced fixers and site supervisors understands that every project has unique demands — and that a reliable, communicative contractor is as valuable as a skilled one.
When you work with BAS Frames, you benefit from:
- Clear communication at every stage of the drylining process
- Experienced fixers working to manufacturer and BS8212 standards
- Flexible scheduling to integrate with your build programme
- Transparent pricing with no hidden costs
- Full documentation, including method statements and fire certificates, where required
- A dedicated point of contact throughout your project
Frequently Asked Questions
How long does the drylining process take from start to finish?
For a typical residential room or extension, the complete drylining process — including framing, boarding, taping, and finishing — usually takes 5 to 10 working days, depending on room size and specification. Larger commercial projects are programmed individually and can run from a few weeks to several months.
Can drylining work continue while the building is occupied?
Yes, in many cases. Drylining is a relatively clean, low-noise trade compared to wet trades. On occupied sites, we follow a detailed method statement covering dust suppression, waste management, and working hours. Your project manager will discuss this with you upfront.
Do I need to move furniture or clear the space?
For domestic projects, yes — the area being drylined should be cleared to allow safe working and unobstructed access. For commercial fit-outs, BAS Frames works with the principal contractor to define safe working zones.
Will there be dust and mess?
Cutting plasterboard generates fine dust. We use dust sheets and vacuum-attached cutting tools where practical, and we leave the site clean at the end of each working day. Taping and jointing are near-dust-free processes, though sanding creates fine particles — we recommend covering sensitive equipment during this stage.
What finish level should I specify?
The finish level depends on your intended decoration. A Level 3 finish is standard for most painted walls, while Level 4 or 5 is recommended for high-sheen paints, skim plaster, or thin wallcoverings. Our team can advise on the appropriate finish for your project.
What are the stages of a drylining installation?
The drylining installation process has five main stages: 1) Set-out — marking floor and ceiling lines for track positions; 2) Track fixing — securing floor and ceiling tracks to the structure; 3) Stud installation — cutting and inserting studs at specified centres; 4) First-fix services — M&E contractors install pipes and cables in the cavity; 5) Boarding — plasterboard fixed to one or both faces; 6) Tape and joint or skim — finishing the board surface for decoration.
How long does drylining installation take per m²?
An experienced drylining operative can install approximately 15–25m² of partition (both faces boarded) per day, including framework, boarding and tape and joint. Output varies with partition complexity, board specification, access conditions and services integration. A single-storey commercial fit-out of 500m² of partition can typically be completed in three to four weeks.
What are the most common drylining installation defects?
Common drylining installation defects include: inadequate fixing of studs to floor and ceiling tracks (causing movement), inconsistent stud spacing (causing board span problems), unsealed service penetrations (undermining fire and acoustic ratings), improperly taped joints (leading to cracking), and failure to install required movement joints (causing board cracking over time).
Who inspects drylining installation quality?
Drylining installation quality is typically inspected by the main contractor’s site manager, the employer’s agent or clerk of works, and building control (for fire-rated elements). On higher-risk buildings under the Building Safety Act 2022, inspection of all fire-rated drylining is a mandatory documented step in the golden thread process.
Frequently asked questions
How long does the drylining installation process take?
Timescales depend on area and specification, but a skilled team installs roughly 80–120 m² of walled area per day. The process runs through nine stages — from site survey and setting out, through metal framing, first-fix services, boarding, taping and jointing, to sanding, inspection and handover.
What are the main stages of drylining installation?
Drylining installation follows a set sequence: site survey and specification, setting out and layout, metal framing, first-fix services by other trades, plasterboard installation, taping and jointing, bead and stop work, sanding and inspection, then handover and snag clearance.
What happens during the taping and jointing stage?
Once the plasterboard is fixed, joints between boards are filled and reinforced with jointing tape, then built up and feathered with successive coats. After it dries the surface is sanded flat, giving a seamless, decoration-ready finish across the whole wall or ceiling.